Natural Dyes
Have science fun as a family! Complete activities with parental supervision.
Materials:
- Water
- Vinegar (white is fine, but other types will work too)
- Eggs
- Onion skins (yellow and red separately)
- Small head of red cabbage
- Turmeric
- Grape Juice
- Assortment of bagged teas
- Saucepan (2qt or larger)
- Mugs or mason jars
- ½ teaspoon and 1 tablespoon measuring spoons
- Spoons
- Optional: any type of cooking oil
Procedure
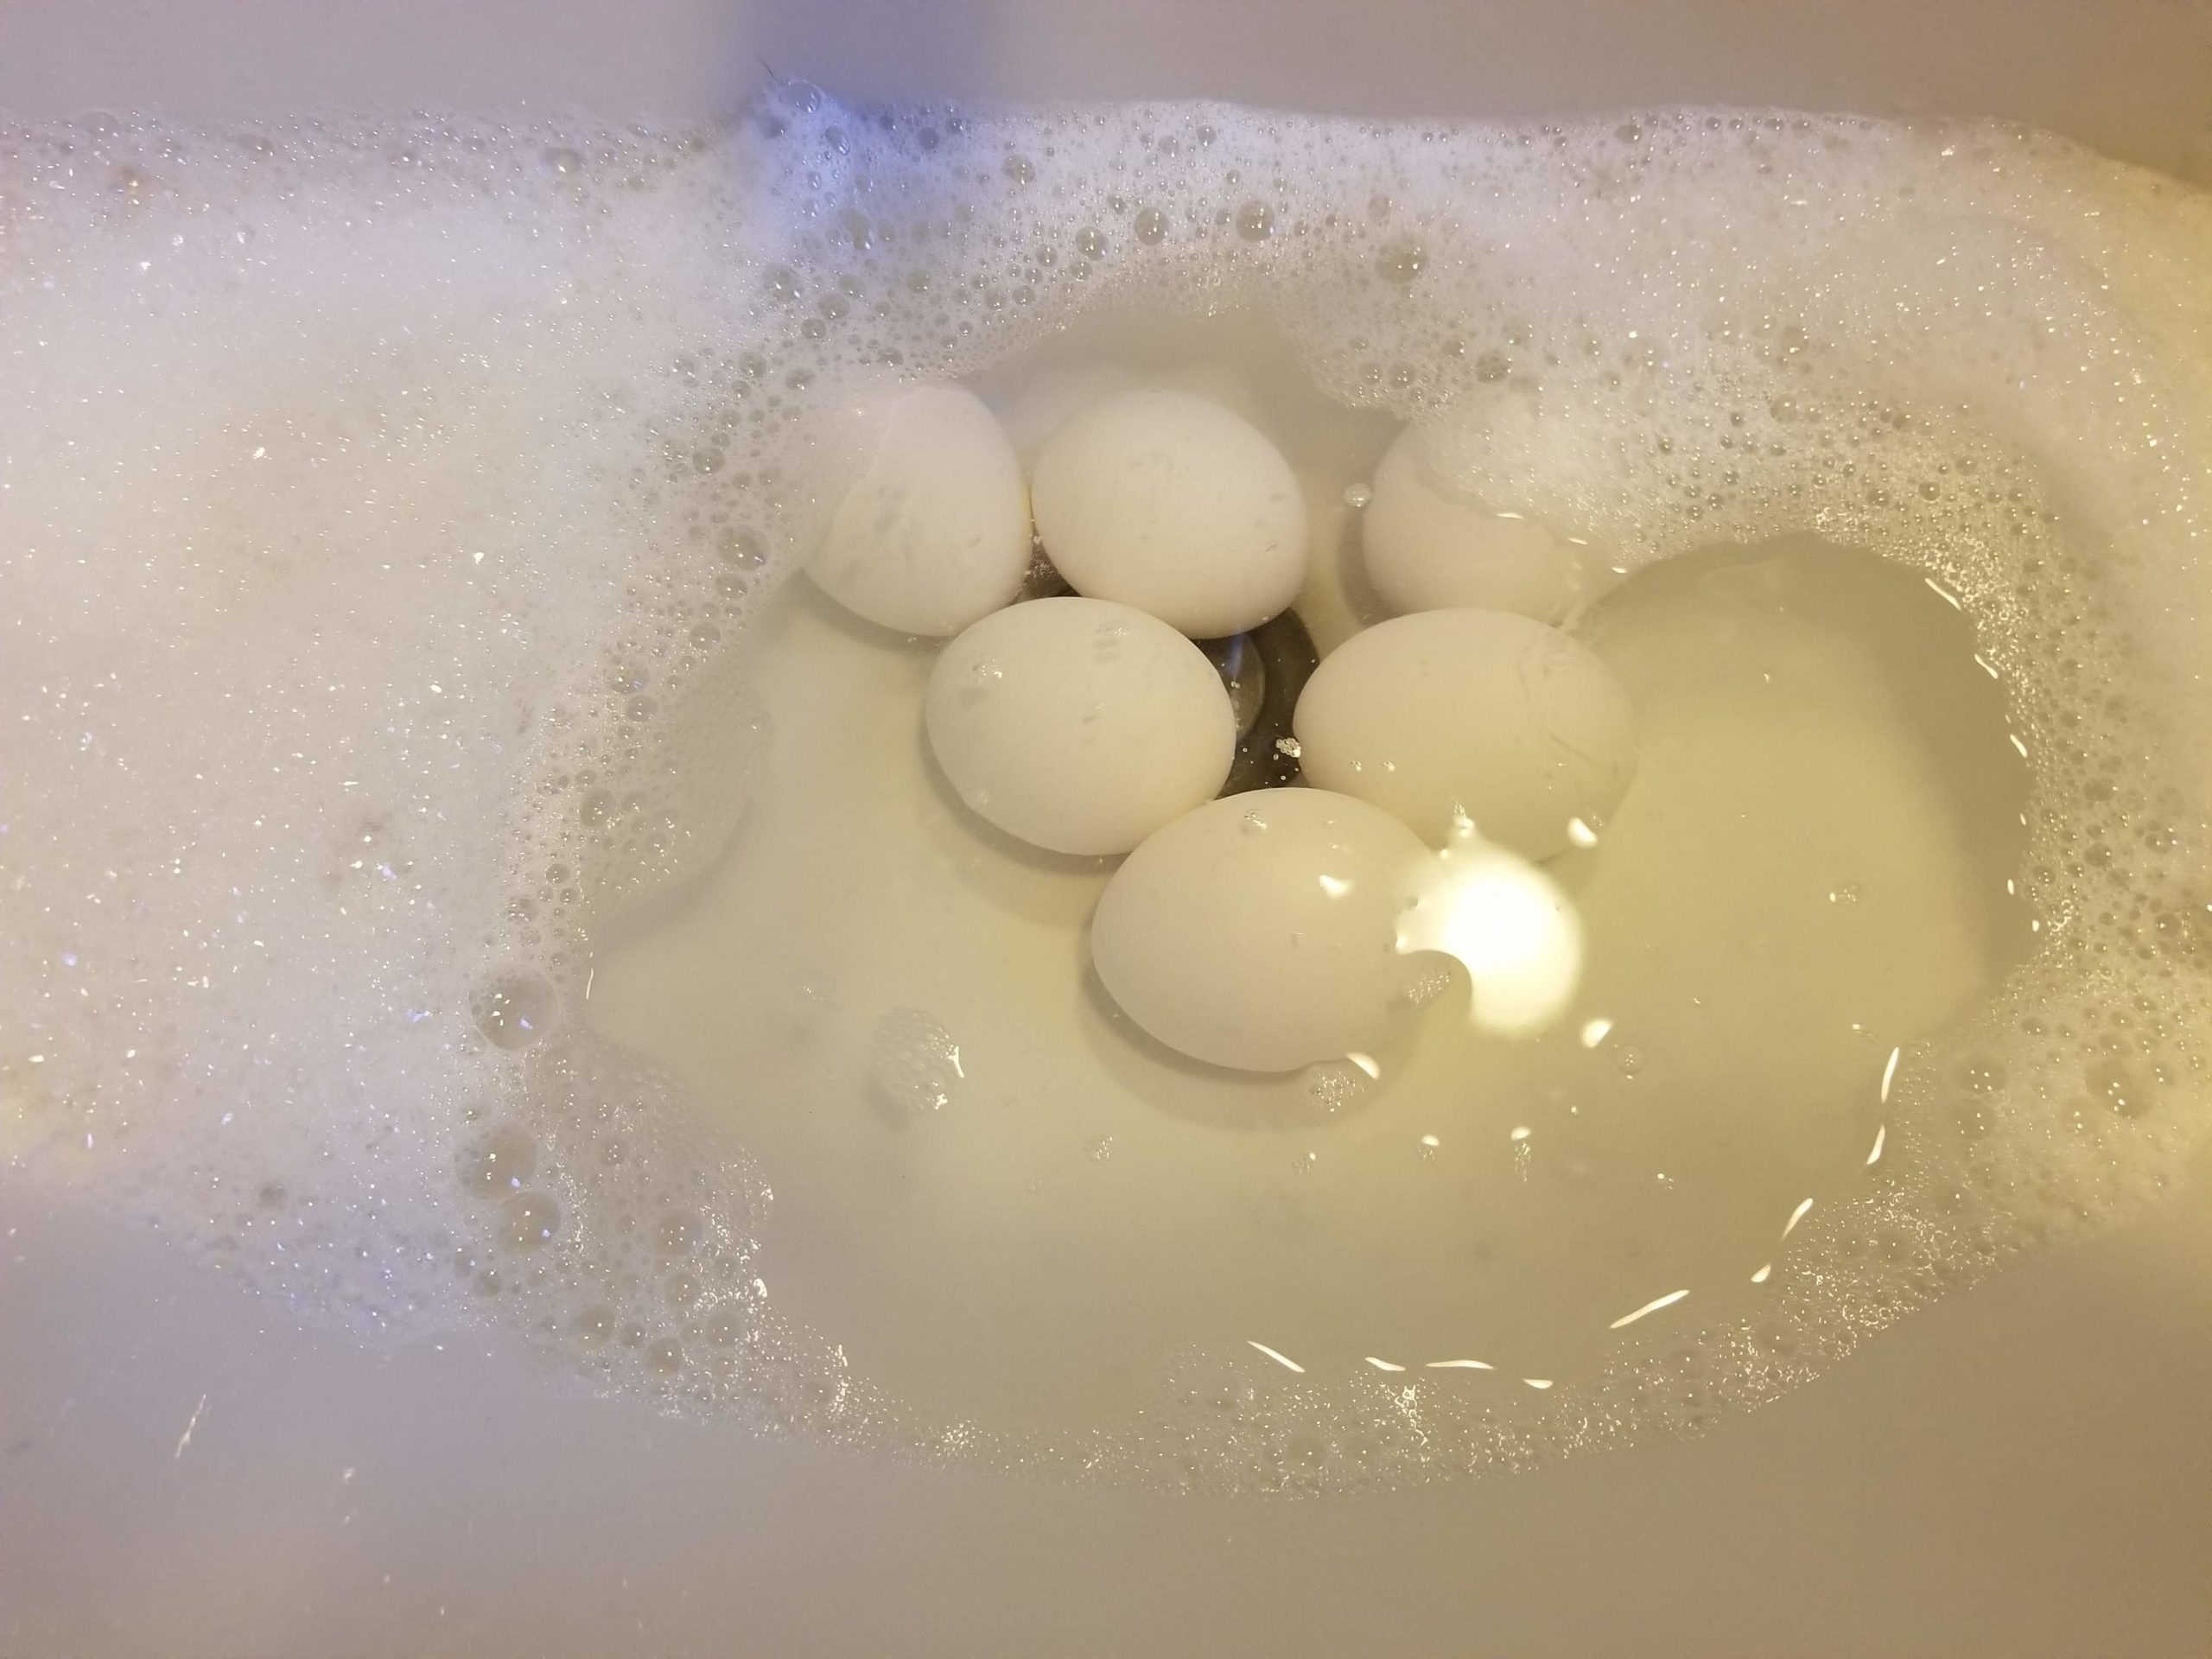
- For most dyes, we want to hard-boil our eggs first. Use your favorite method to hard-boil the number of eggs you want to dye.
- Optional- If your eggs came from a store and not directly from a farm, we recommend washing your eggs before dyeing them. In the U.S., our eggs are treated with wax to help keep them fresh, but this wax can prevent the dye from sticking to the shell. When your eggs have cooled, make a bath of warm water with a few drops of dish soap. Massage your eggs in the soapy water, rinse and dry.
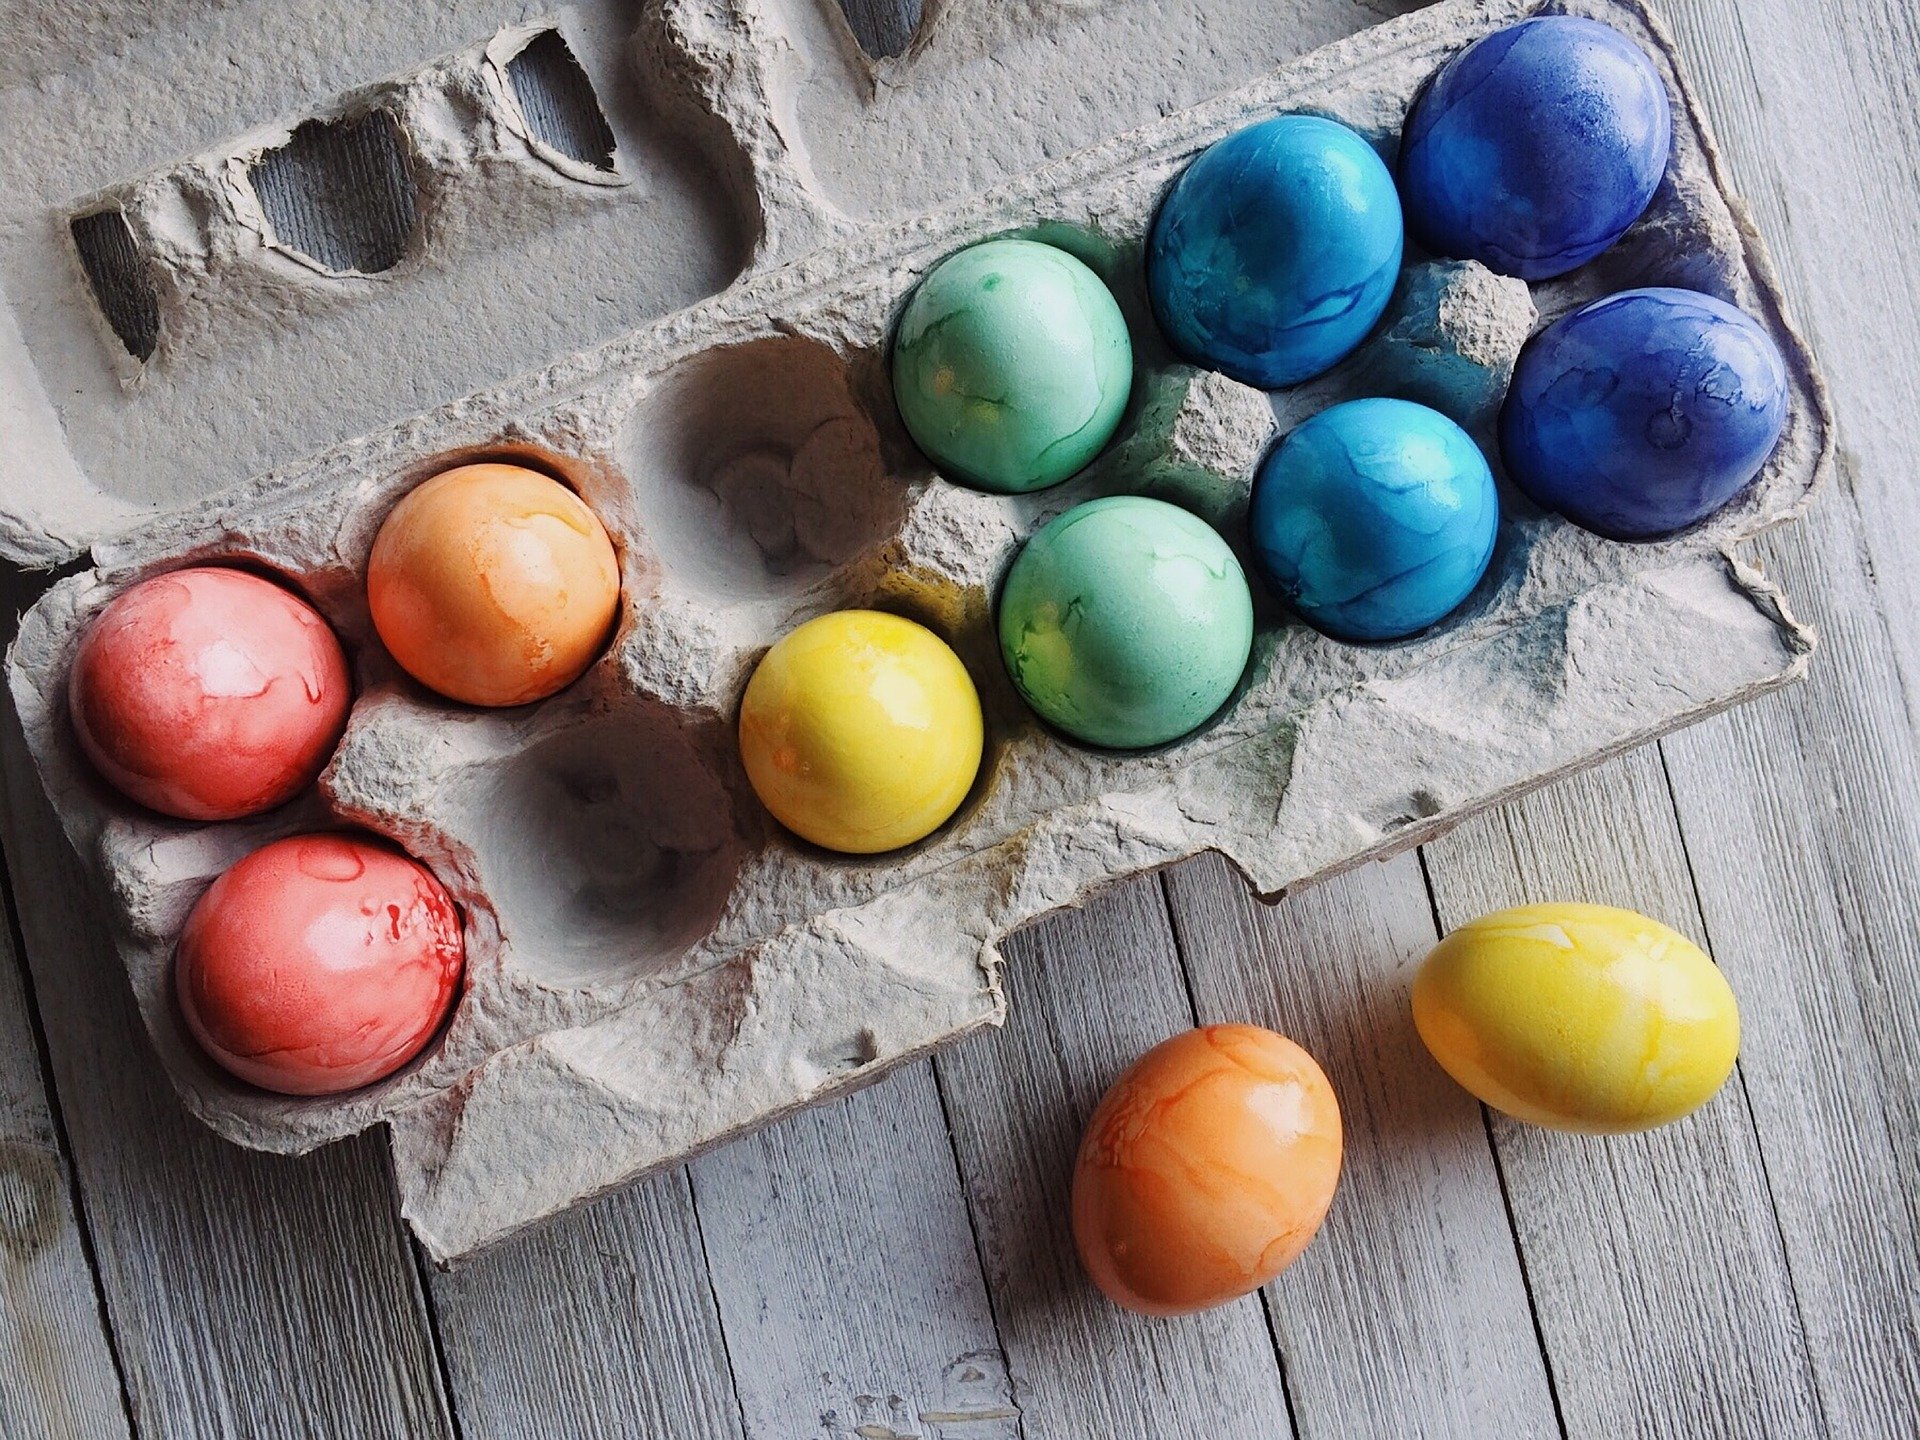
- Each dye is a little different for what works best and the amount of time it takes. The best part of natural dyes is it truly is an experiment! We’ve experimented with many recipes and tweaked them to make the natural dyes for Spring Egg-stravaganza. Recipes to get you started for each dye are below.
- Hypothesize (guess) what the egg will look like when it comes out of each of the dyes. What color will it be?
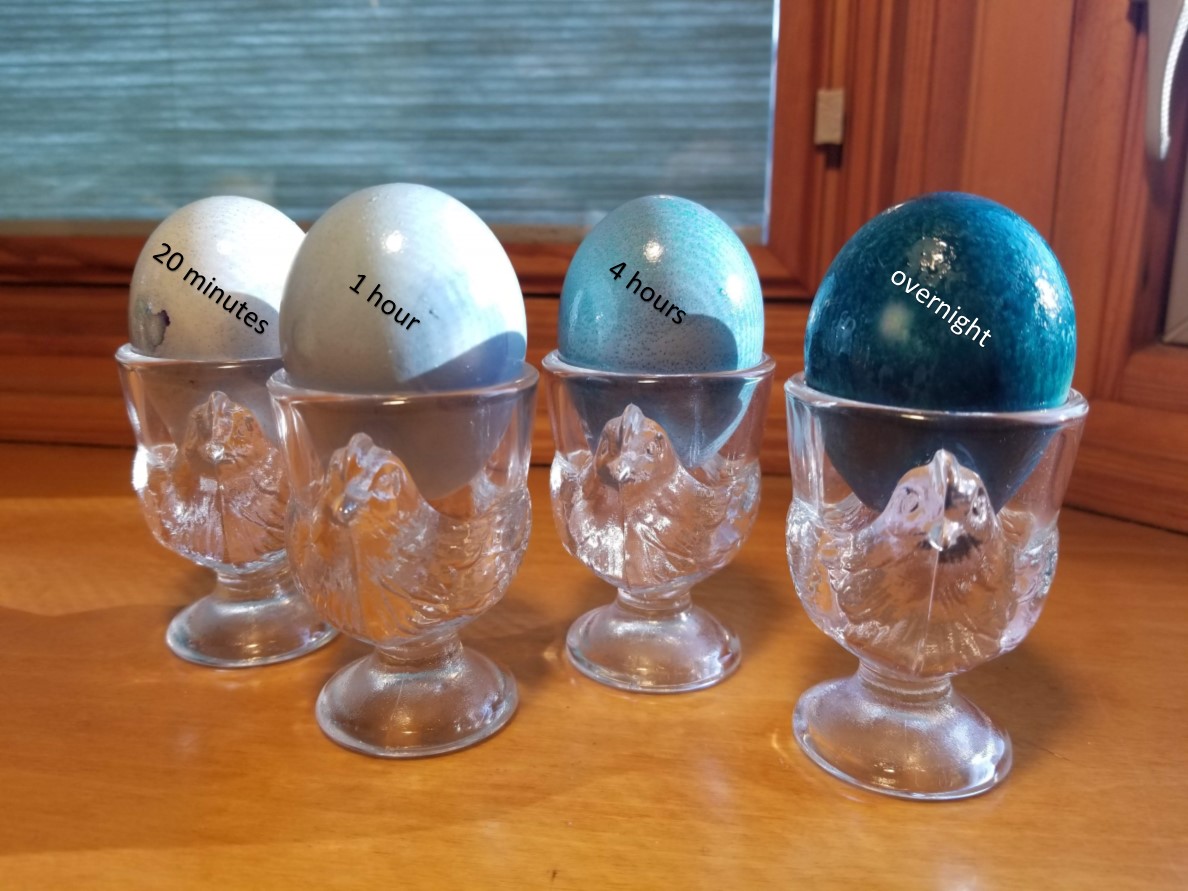
- Leave an egg in for just a few minutes, or leave it overnight in the refrigerator, and see what happens!
- What if you put an egg in one dye and then put it in another dye? What happens if you mix two dyes together?
- Take care not to handle the eggs too much when you take them out of the dyes.
- Once the eggs have dried, you can rub them with a small amount of cooking oil and a paper towel to make them shine.
- Be sure to take a picture or video to share in the Facebook comments on the Buffalo Museum of Science or Tifft Nature Preserve pages.
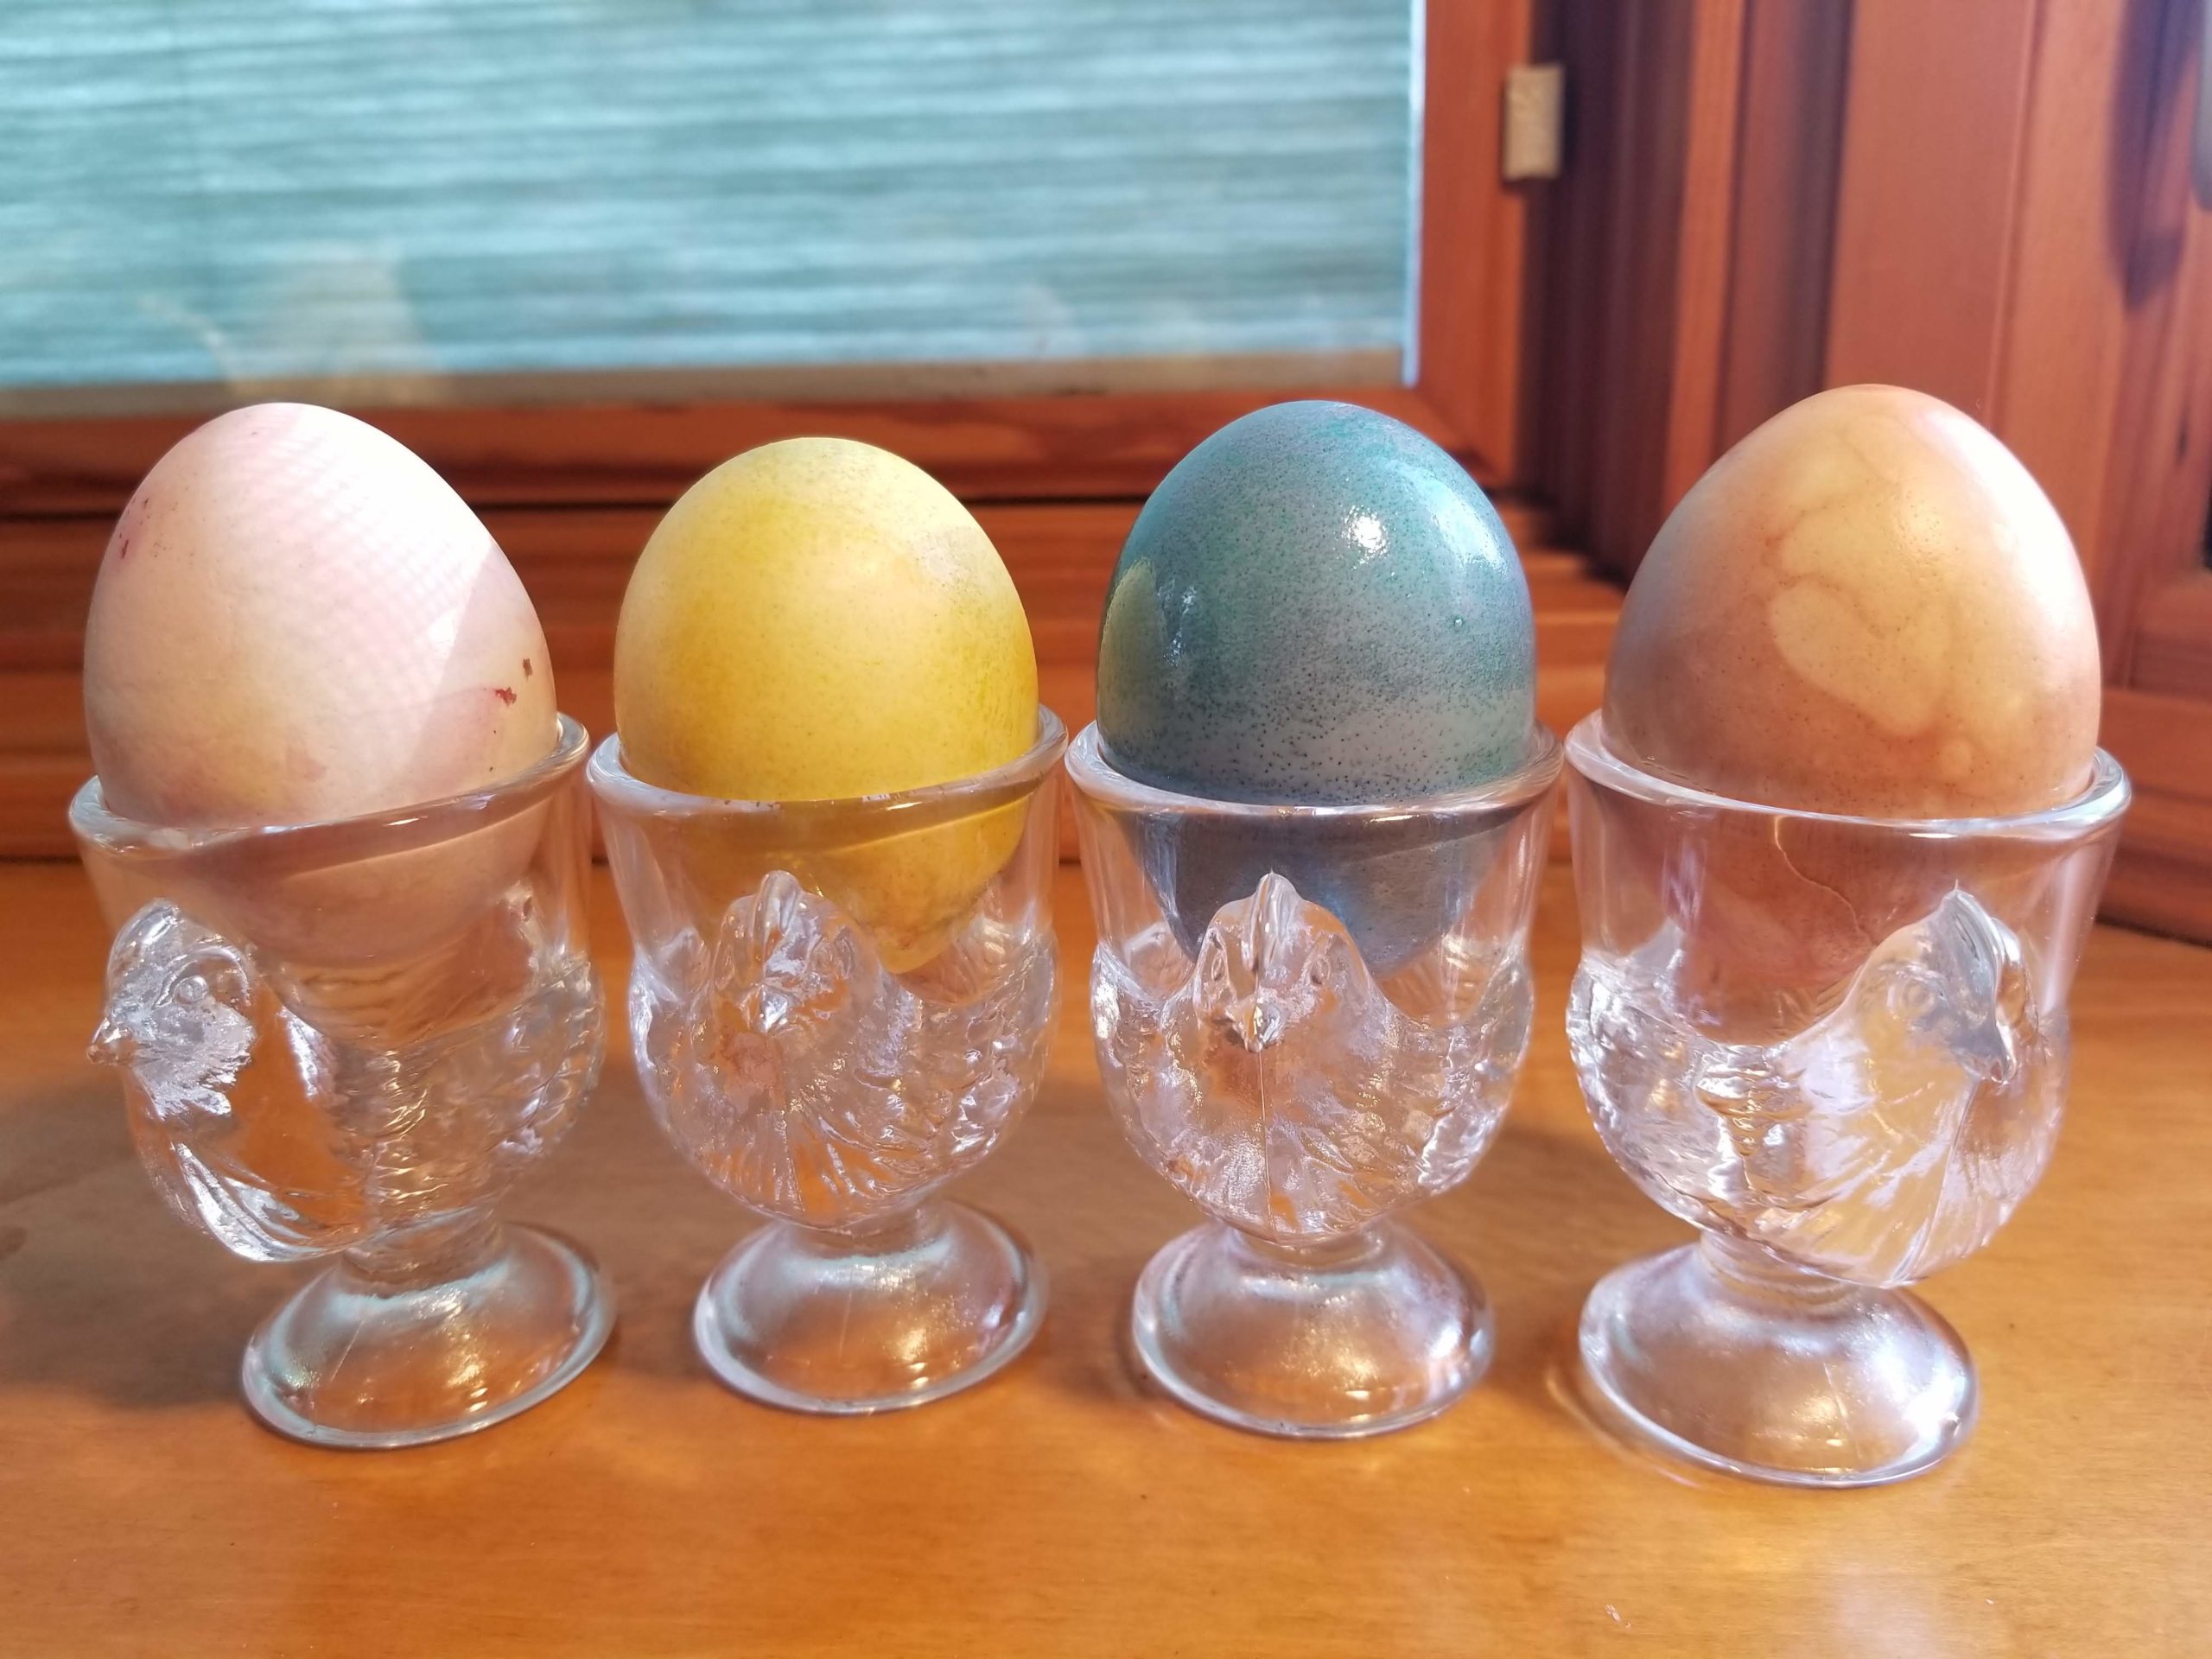
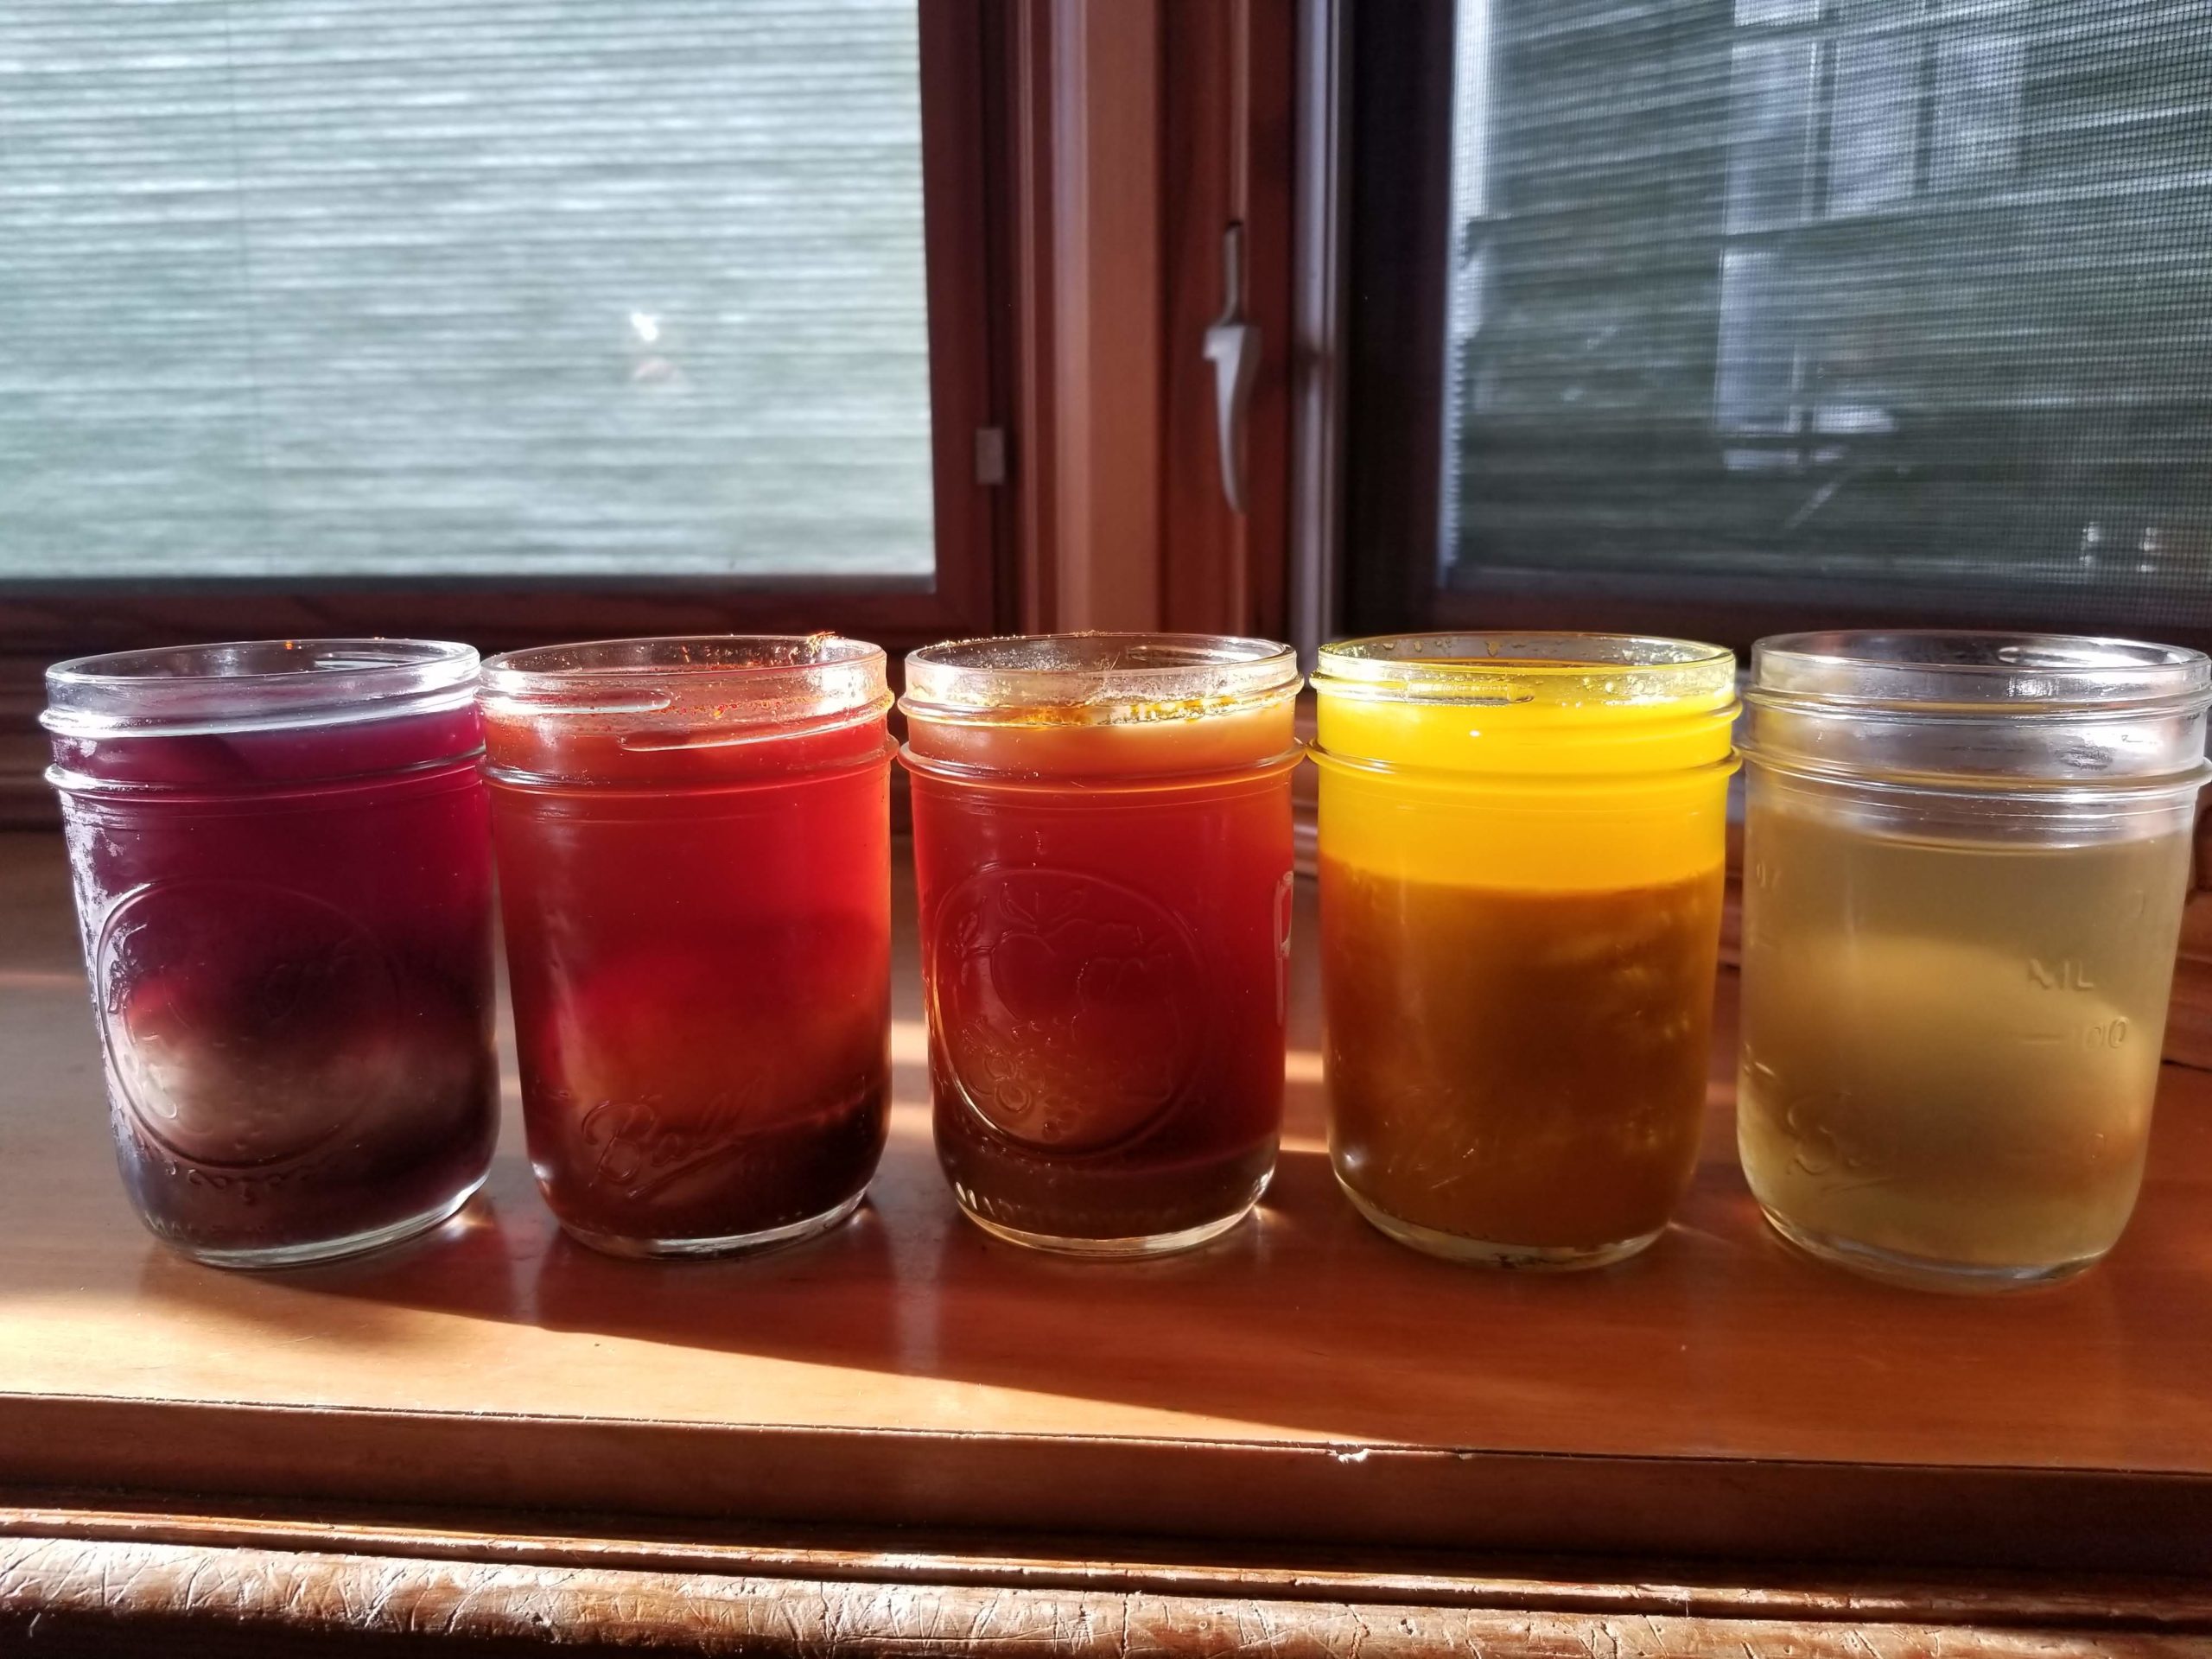
Onion Skins- Yellow or Red
For onion skin dyes, we only want to use the dark, papery outer layer from the onion.
- Option 1- Add equal parts water and onion skins, with a tablespoon of vinegar in a saucepan. Bring to a boil and let simmer for at least 30 minutes. Let cool and strain out the onion skins, reserving the liquid dye. Dye hard-boiled eggs until you achieve the desired color.
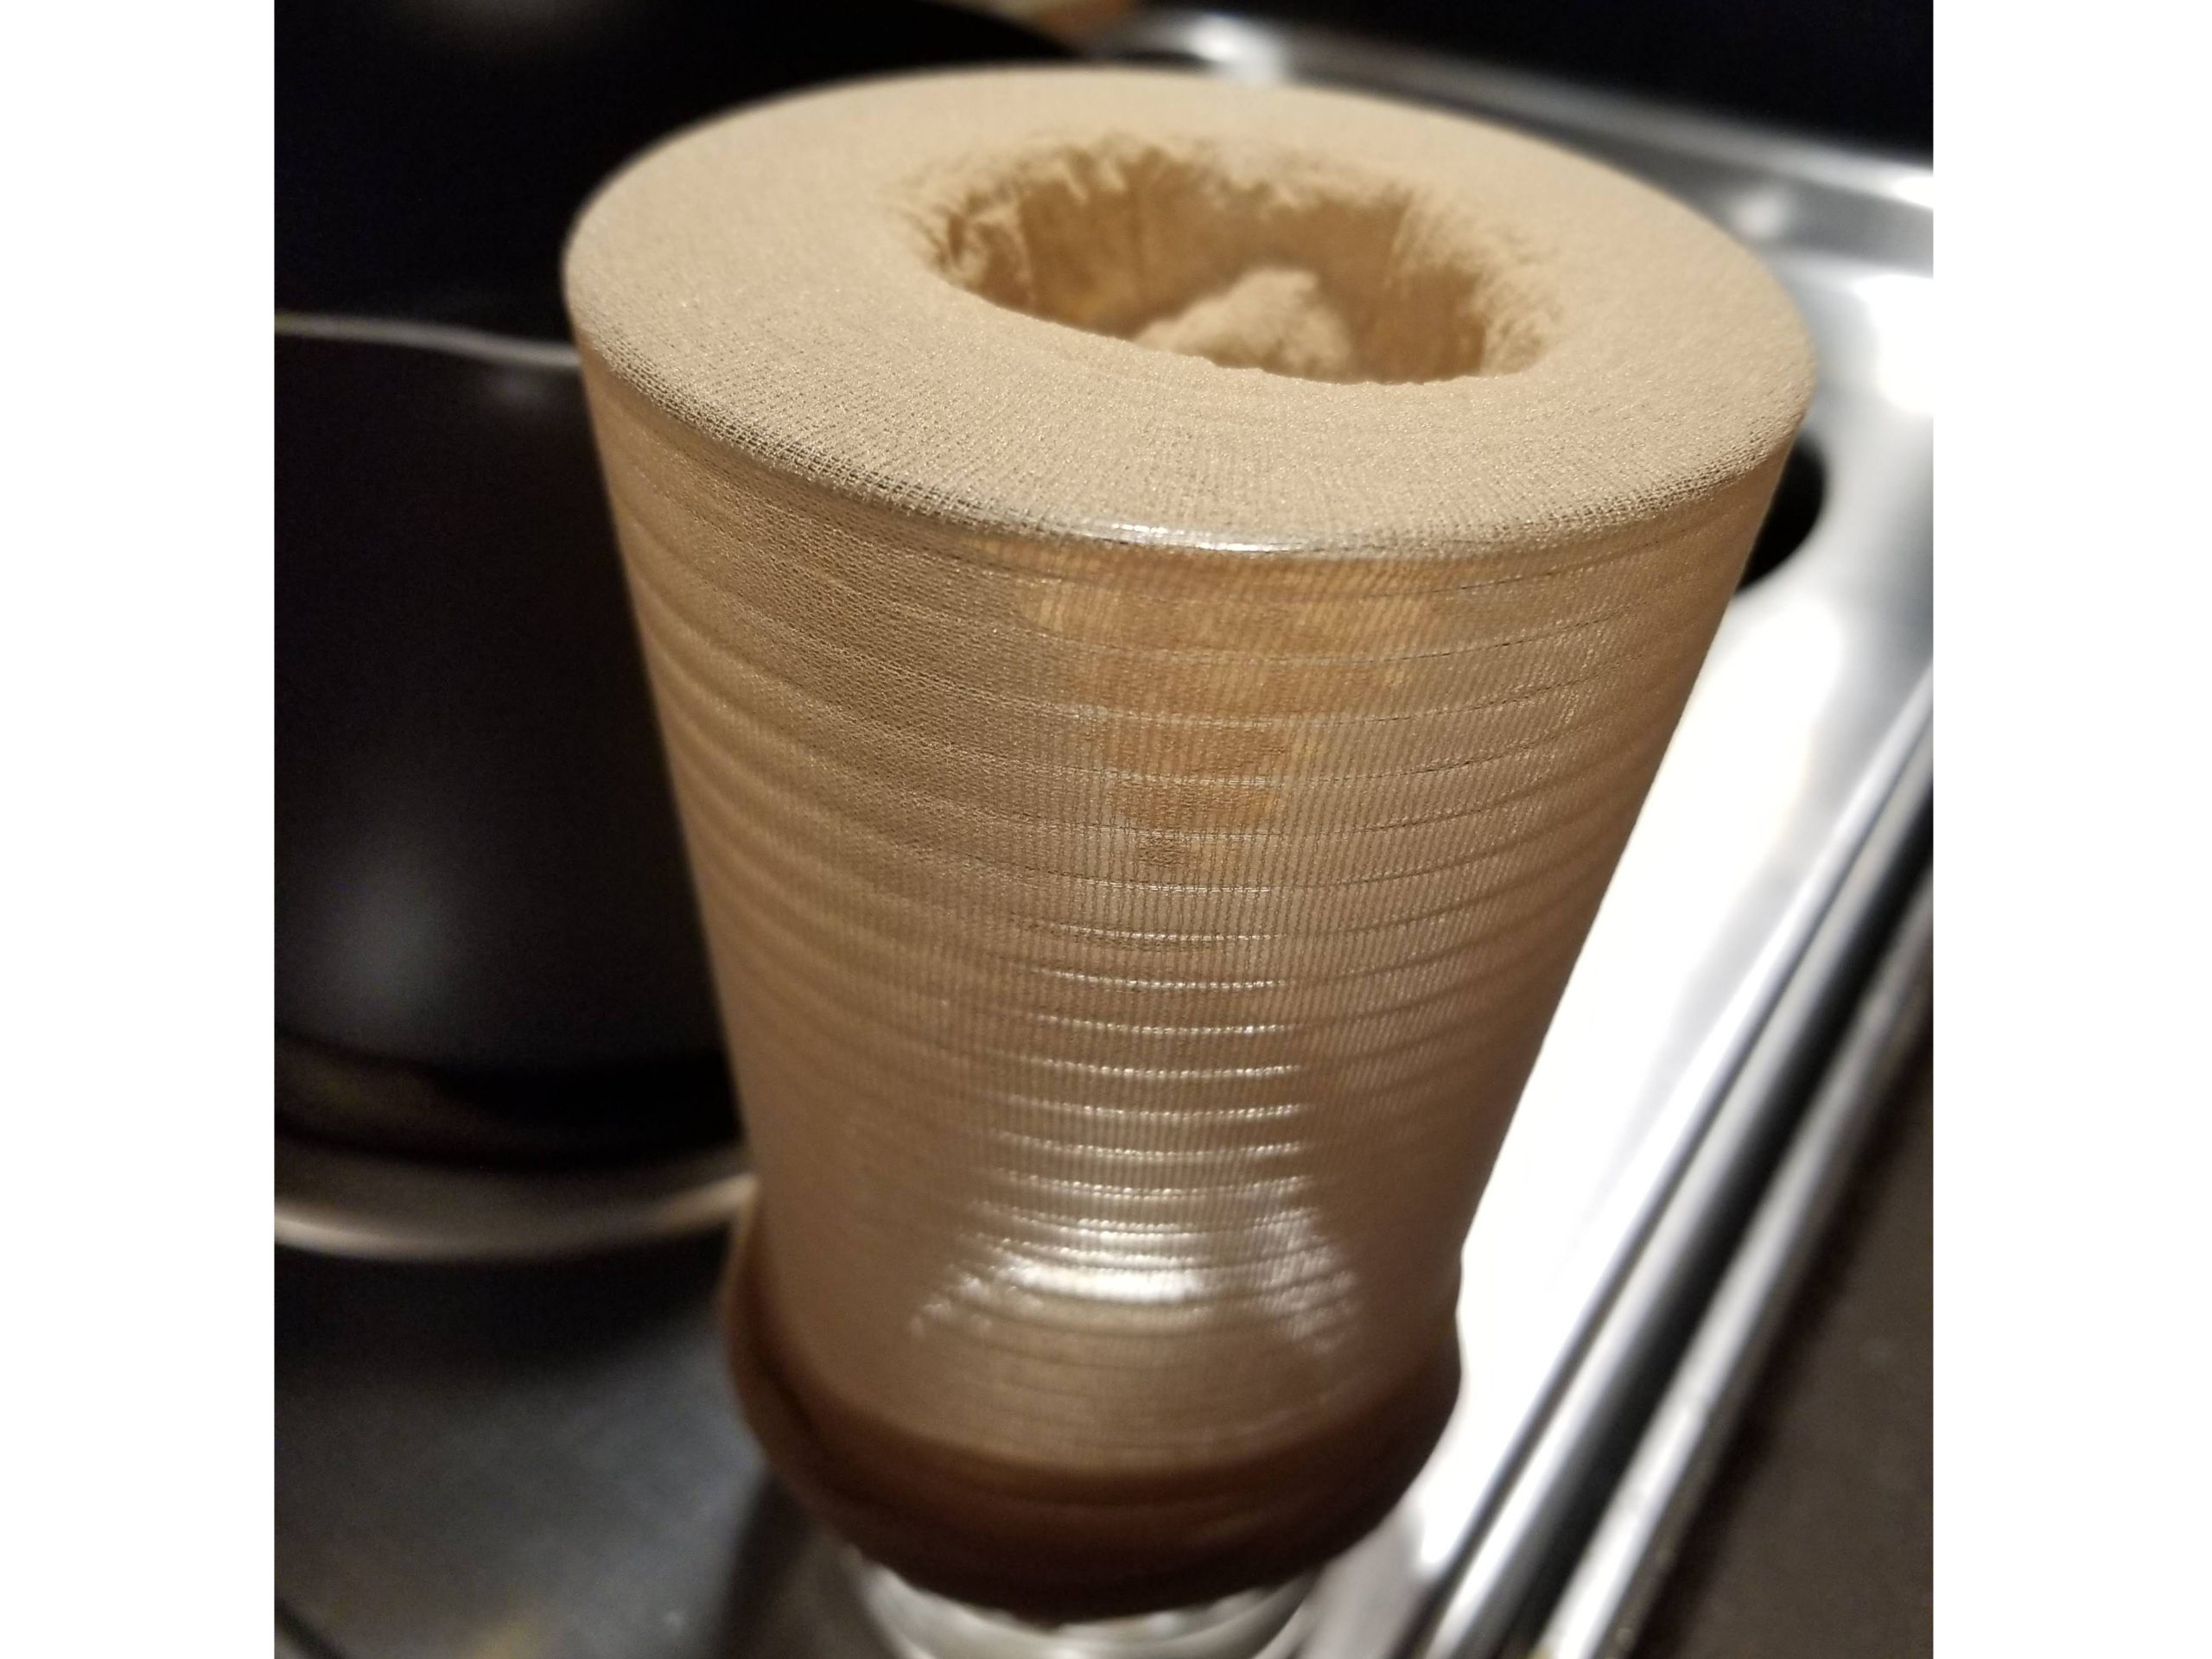
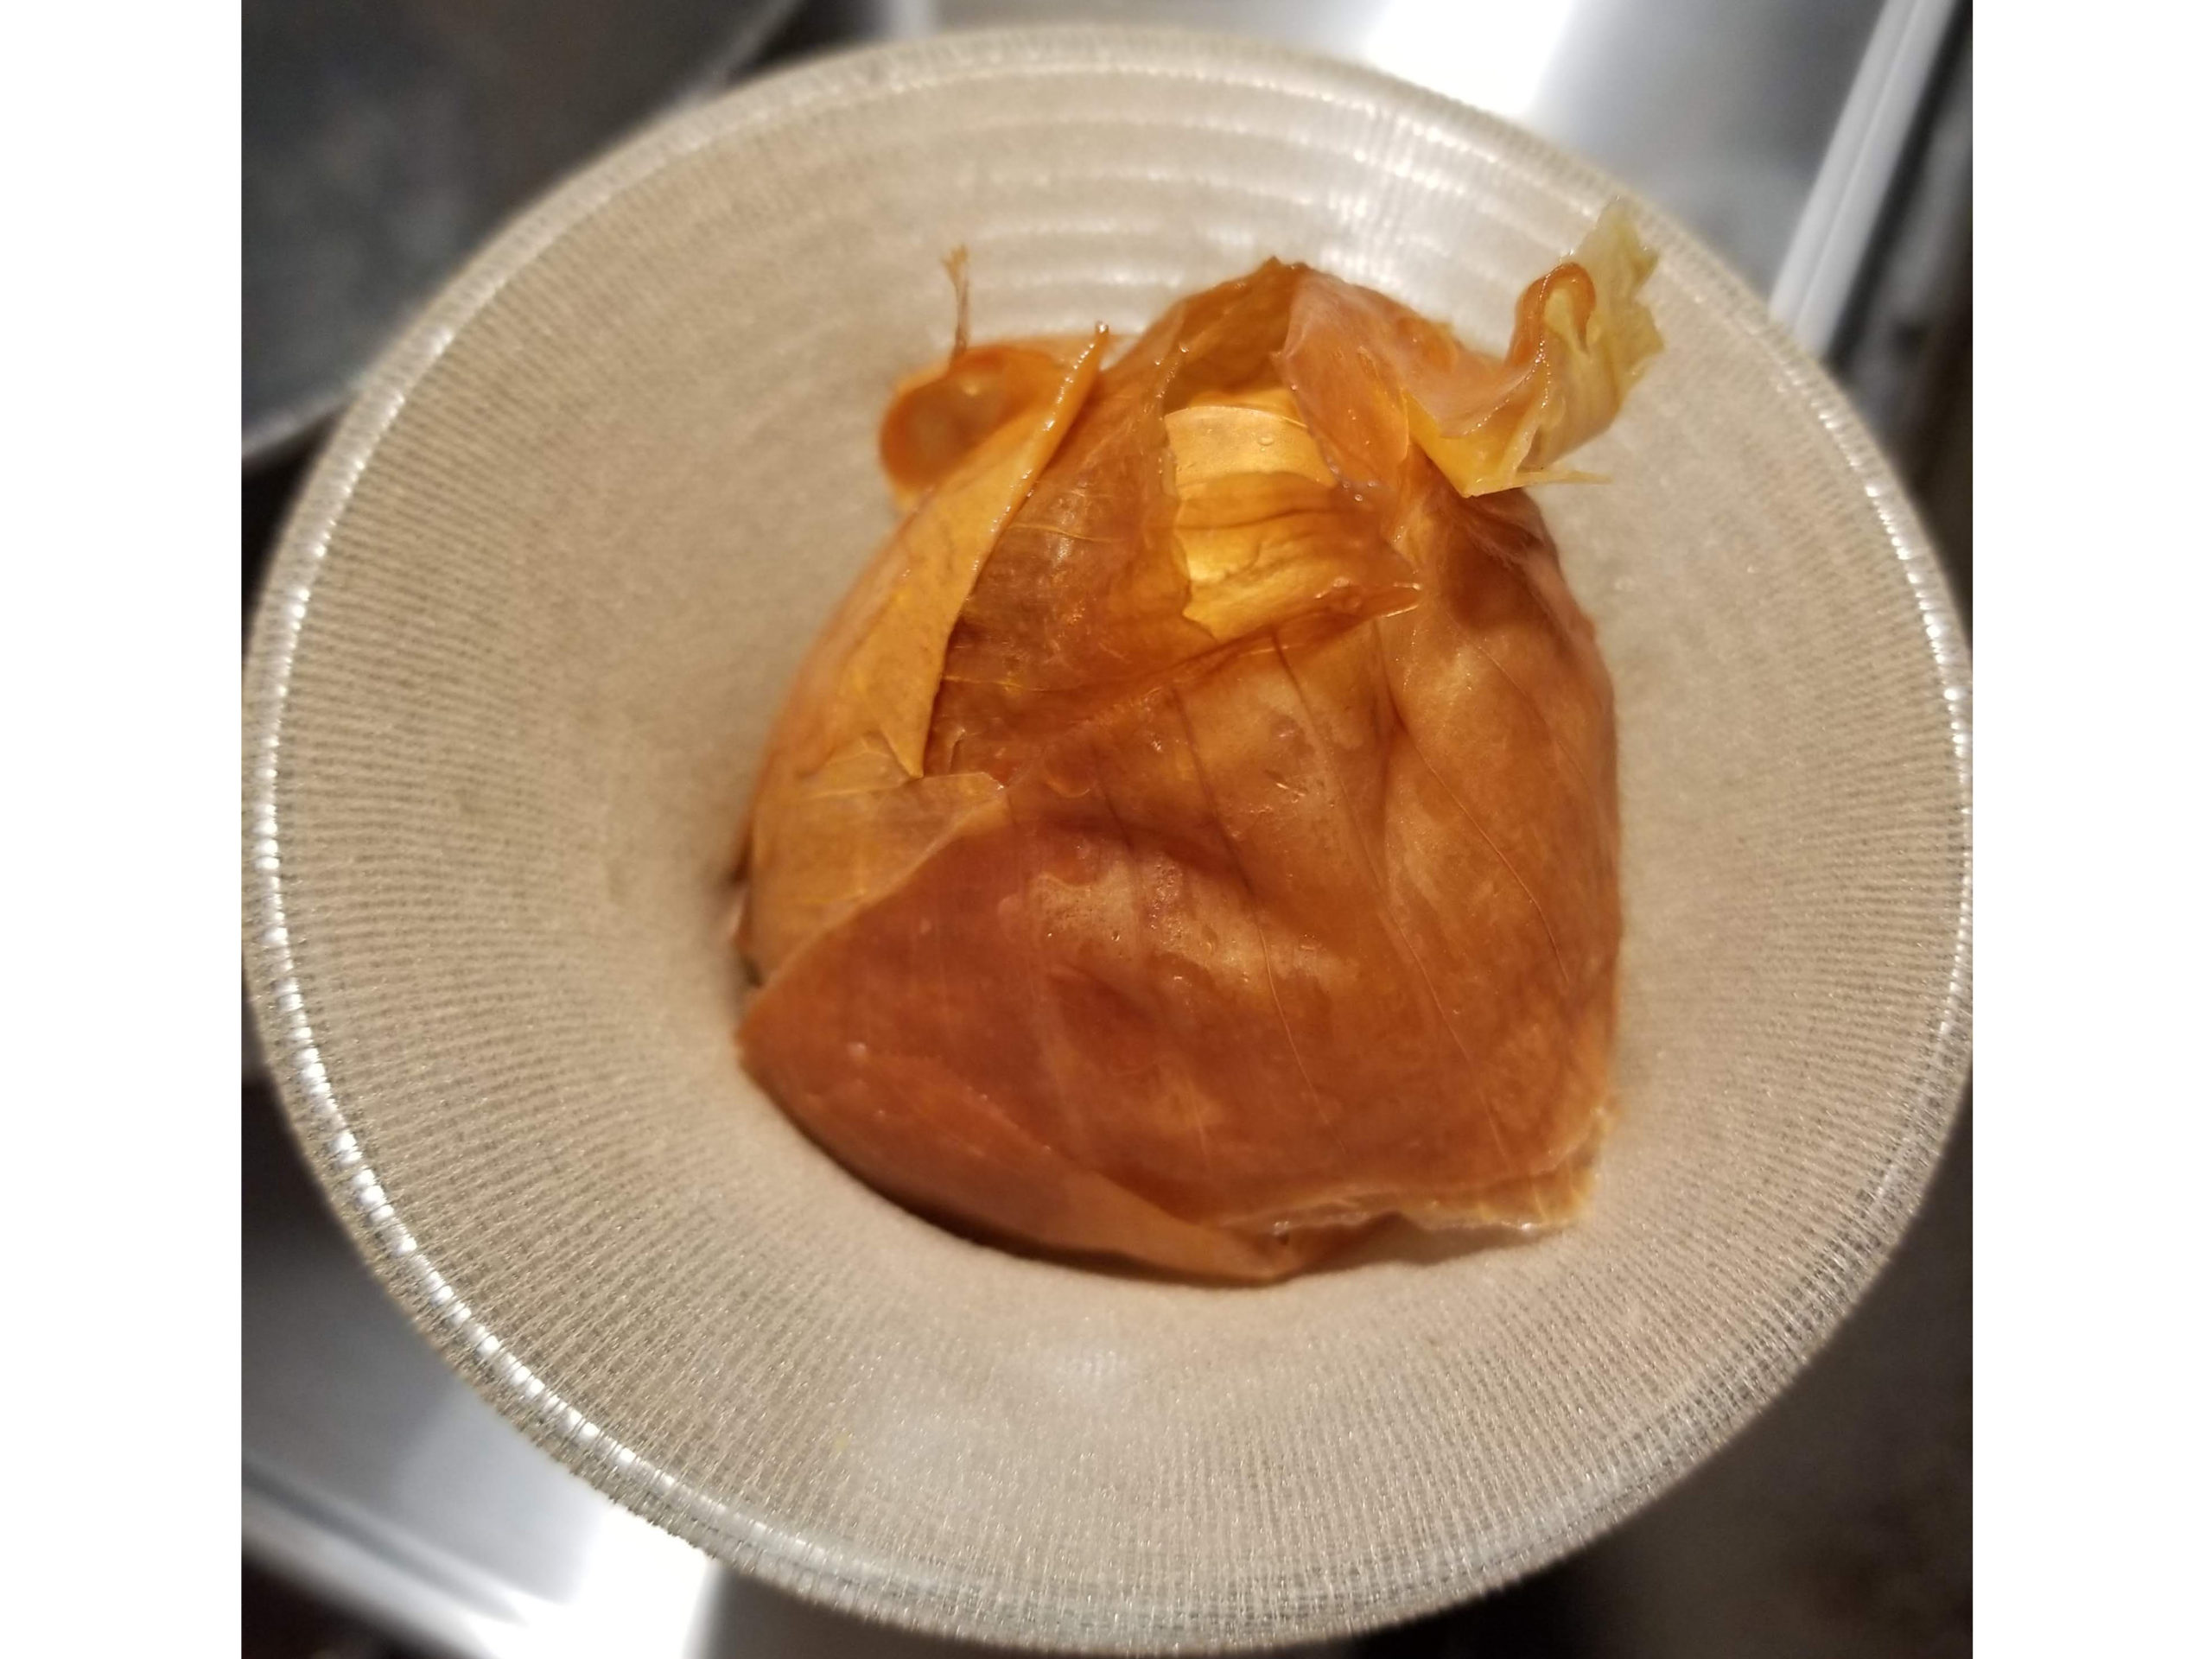
- Option 2- Soak onion skins in warm water until they are soft (this only takes a few minutes). Wrap an uncooked egg in the onion skins and place inside a pantyhose or tight and tie a knot. (Helpful hint: put the toe of the pantyhose in a glass and pull over the top of a glass. This makes it much easier to get the egg into the bottom without the onion skins falling off! See images 4 and 5.) Put the egg in a saucepan with enough cold water to cover the egg. Bring to a boil. Turn down to low heat and cover. After 16 minutes, remove the egg from the pot. Once it has cooled enough to safely handle, remove the egg from the pantyhose and peel off the onion skins. This method does not give a uniform color to the egg but uses fewer onion skins.
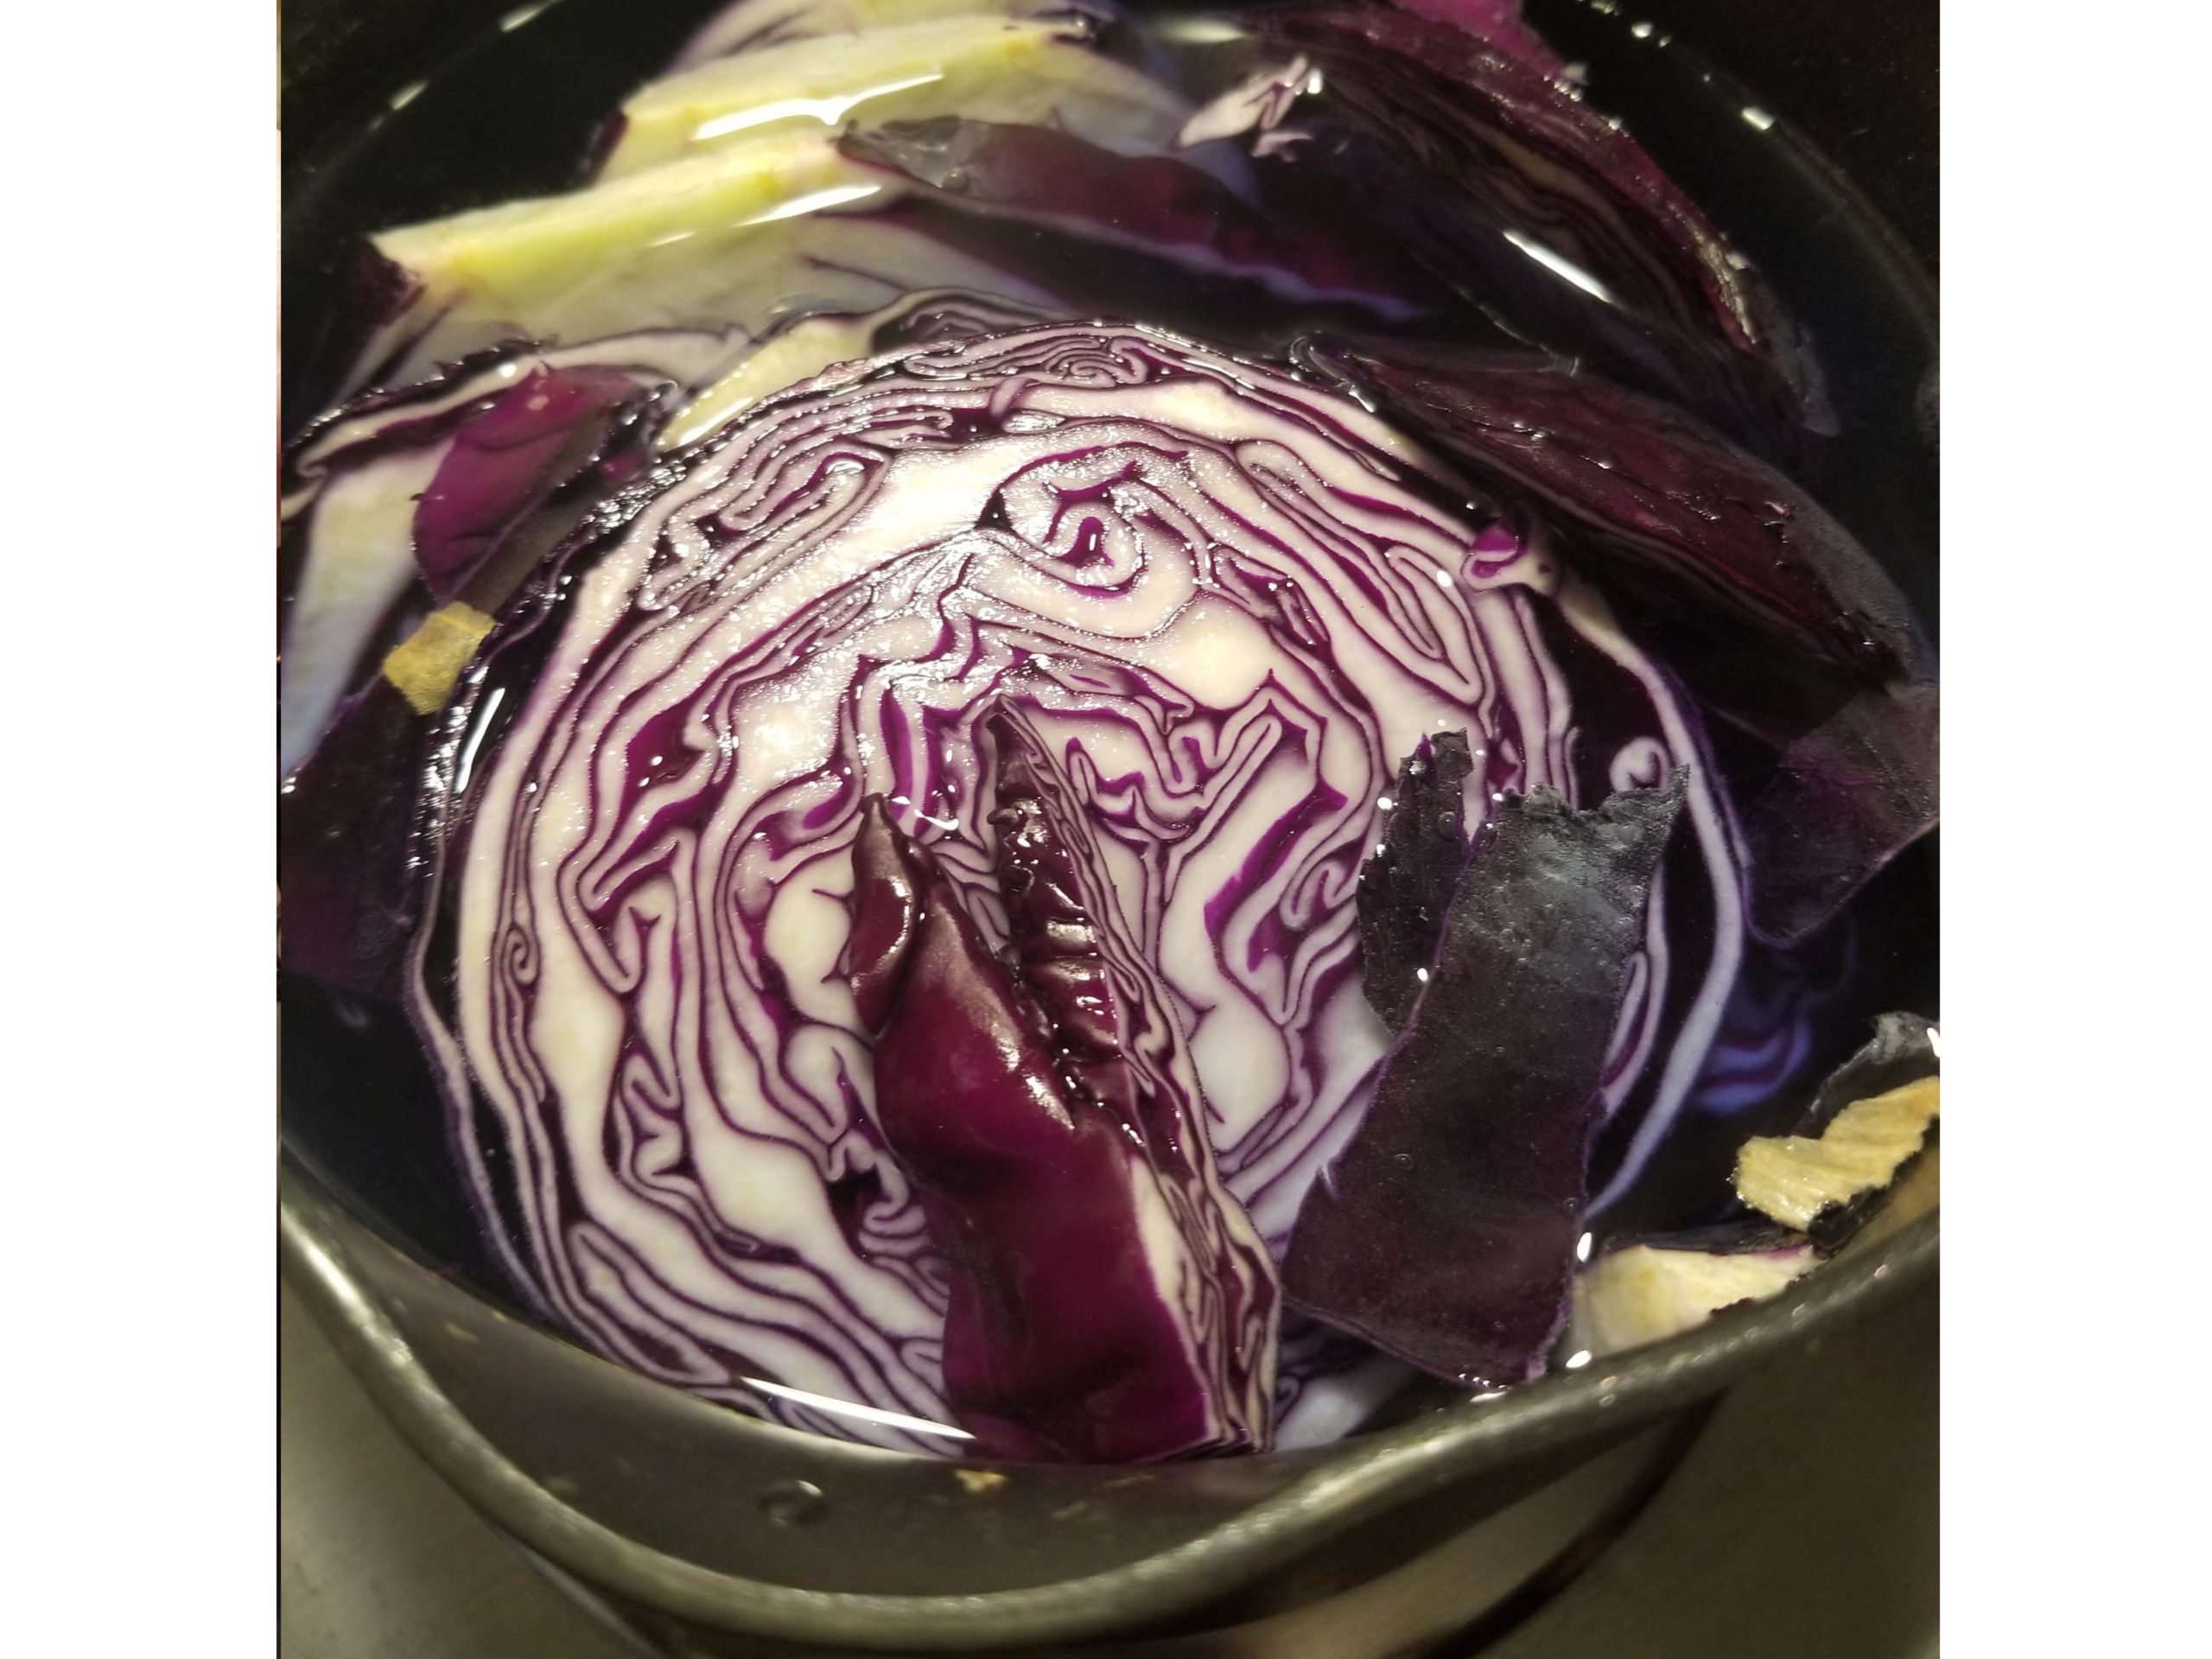
Red Cabbage
This dye is great because you can eat the cabbage after you make the dye, and we’ll use the leftovers for an experiment next week!
- Carefully, cut up a head of red cabbage- nothing fancy, and put in a saucepan. Add enough water to just cover the cabbage. Bring to a boil then reduce to a simmer for 30 minutes. Let cool then strain out the cabbage, reserving the liquid dye.
- Do not add vinegar to the saucepan. Add a ½ teaspoon of vinegar to the jars or mugs you are using to dye the eggs in.
- Soak hard-boiled eggs until you achieve the desired color.
Turmeric
It is no surprise that this vibrant spice, that dyes everything it touches yellow, makes a great egg dye. Beware that turmeric will dye your fingers and any surface it touches.
- Add a tablespoon of turmeric powder, ½ tsp of vinegar and hot water to a jar or mug. Soak hard-boiled eggs until you achieve the desired color.
Grape Juice
This dye is simple but takes some time to develop. Be patient!
- Add grape juice and ½ teaspoon of vinegar to a jar or mug. Soak hard-boiled eggs until you achieve the desired color (we recommend for a few hours or overnight).
Teas
Teas are always a bit of an experiment. The color is not always what you would anticipate!
- Add 2 tea bags and ½ teaspoon of vinegar to a jar or mug filled with hot (not boiling) water.

What’s it all about?
The most frequent question with dyeing eggs is why do we need to add vinegar?
Try putting an uncooked egg in a container deep enough to cover the egg in vinegar. What do you observe happening immediately? What happens after a few hours? Leave the egg in the vinegar overnight? What does the egg look like in the morning?
The shell of an egg is made of calcium carbonate which is a base (like baking soda). Have you ever mixed vinegar and baking soda? What happens? When an egg is put in vinegar, the basic shell reacts with the acidic vinegar. For dying eggs, that reaction helps the dye to activate and stick to the shell.
Try It!
- Before dyeing your egg, carefully (but tightly) wrap rubber bands around the hard-boiled eggs to make a striped pattern or draw on your egg with a piece of clear canning wax or a white crayon.
- What other foods or spices do you have at home that you think would make a good dye? Try them and let us know if they work!